I made a website that has 3D models, lighting, and materials. Likewise, I used a ton of different tools to get this result. And in this article I’ll be going over how I used Blender, React, and Three.JS to make a sick looking website.
YouTube LinkOverview
I already have experience with WebGL from making my own game engine and having to use WebGL to render the game on a website. But I don’t feel like spending weeks on a renderer when there’s Three.js to do that stuff for me. There’s even a React Renderer made for it called React Three Fiber, that’ll help use Three.js with React.js.
Adding 3D Stuff
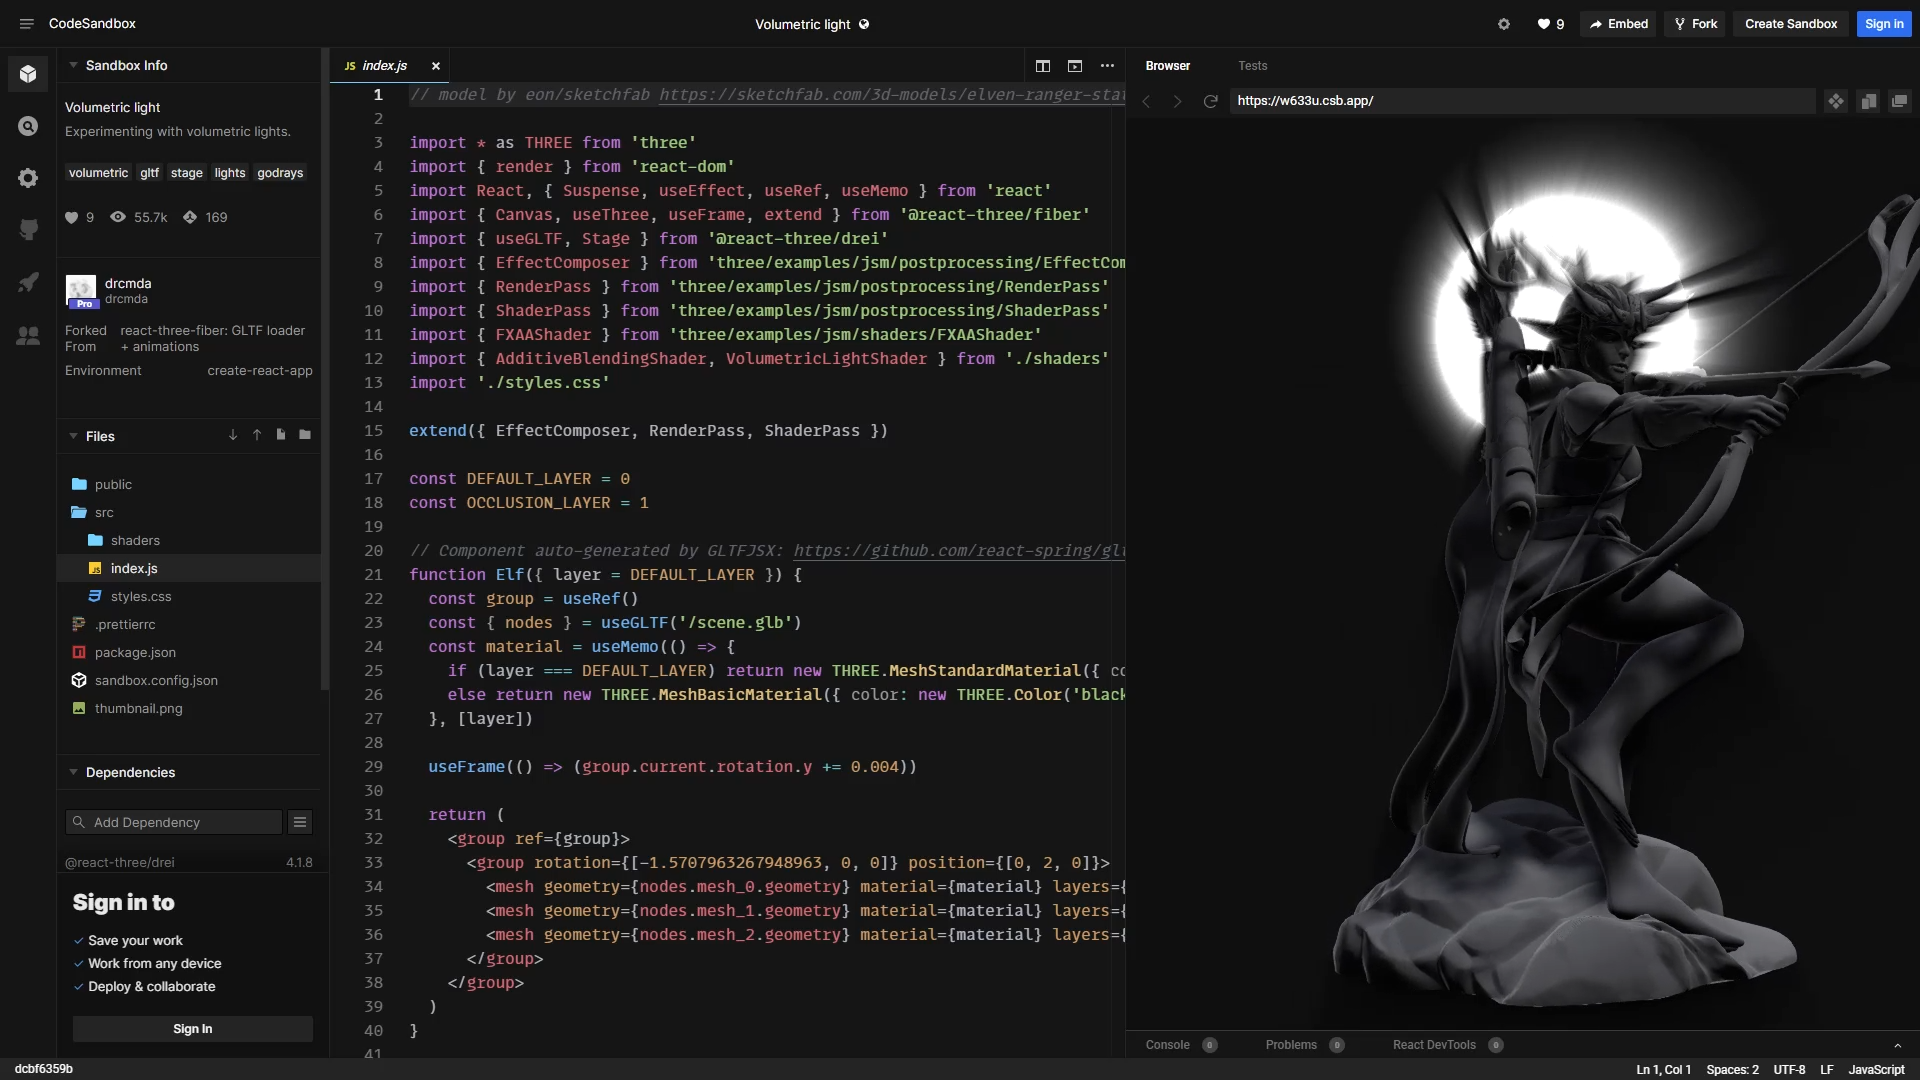 I remember using an example they had that rendered a 3D model. In that example, I noticed they used a GLTFLoader. GLTF is a royalty-free format for loading in models that 3D software like Blender supports, allowing us to use Blender for this project.
 Thankfully, someone also made a GLTF to React Three Fiber code generator that turned out to be really helpful, as it would write out the code you would need to write to load and render the 3D models and materials that’s in the GLTF file.
 They even have a nice website, where you can import 3D models. https://gltf.pmnd.rs/.
Making a 3D Model
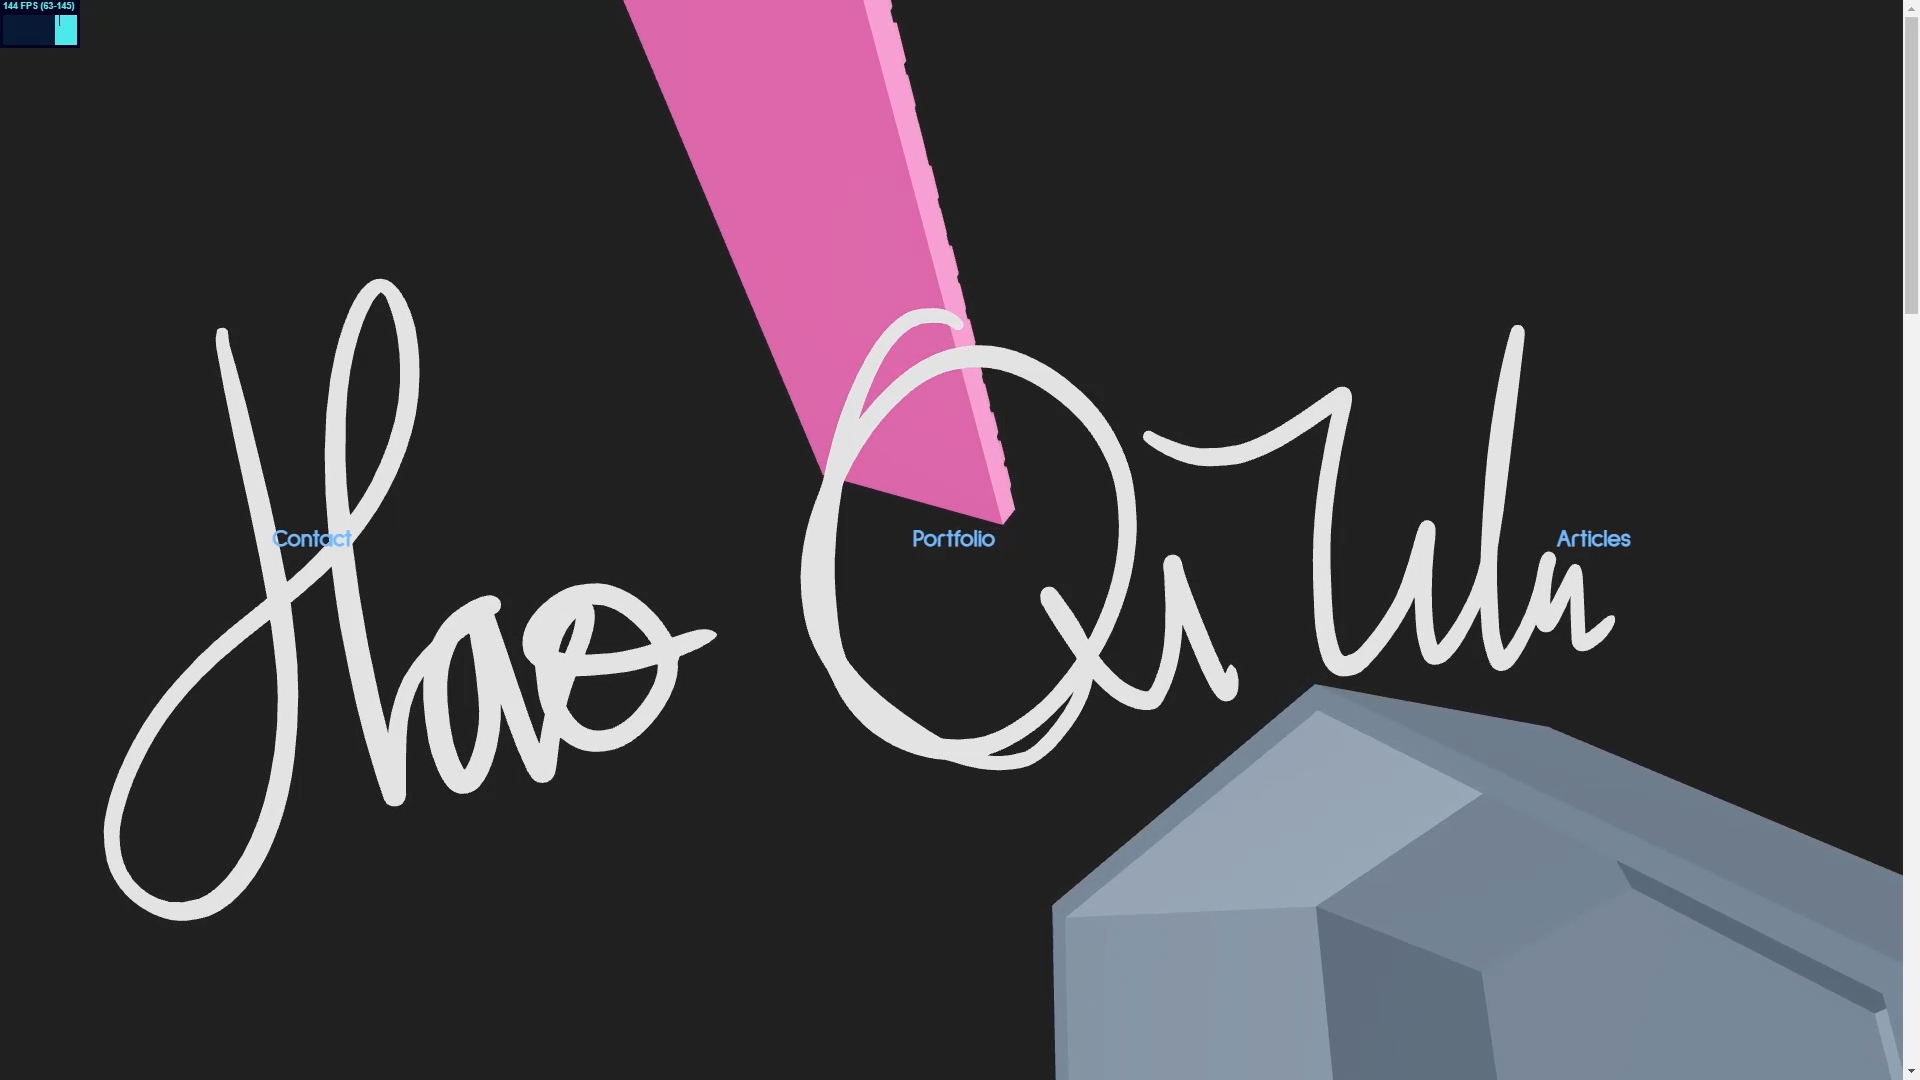
However, before we can render a 3D model, we need a 3D model to render. Looking around in my hard drive, I found a flat 3D model of my name that I made years ago. I basically write my name in Krita, imported that into Inkscape, exported that as an SVG and imported that to Blender, where I turned it into a 3D model and exported that into a GLTF.
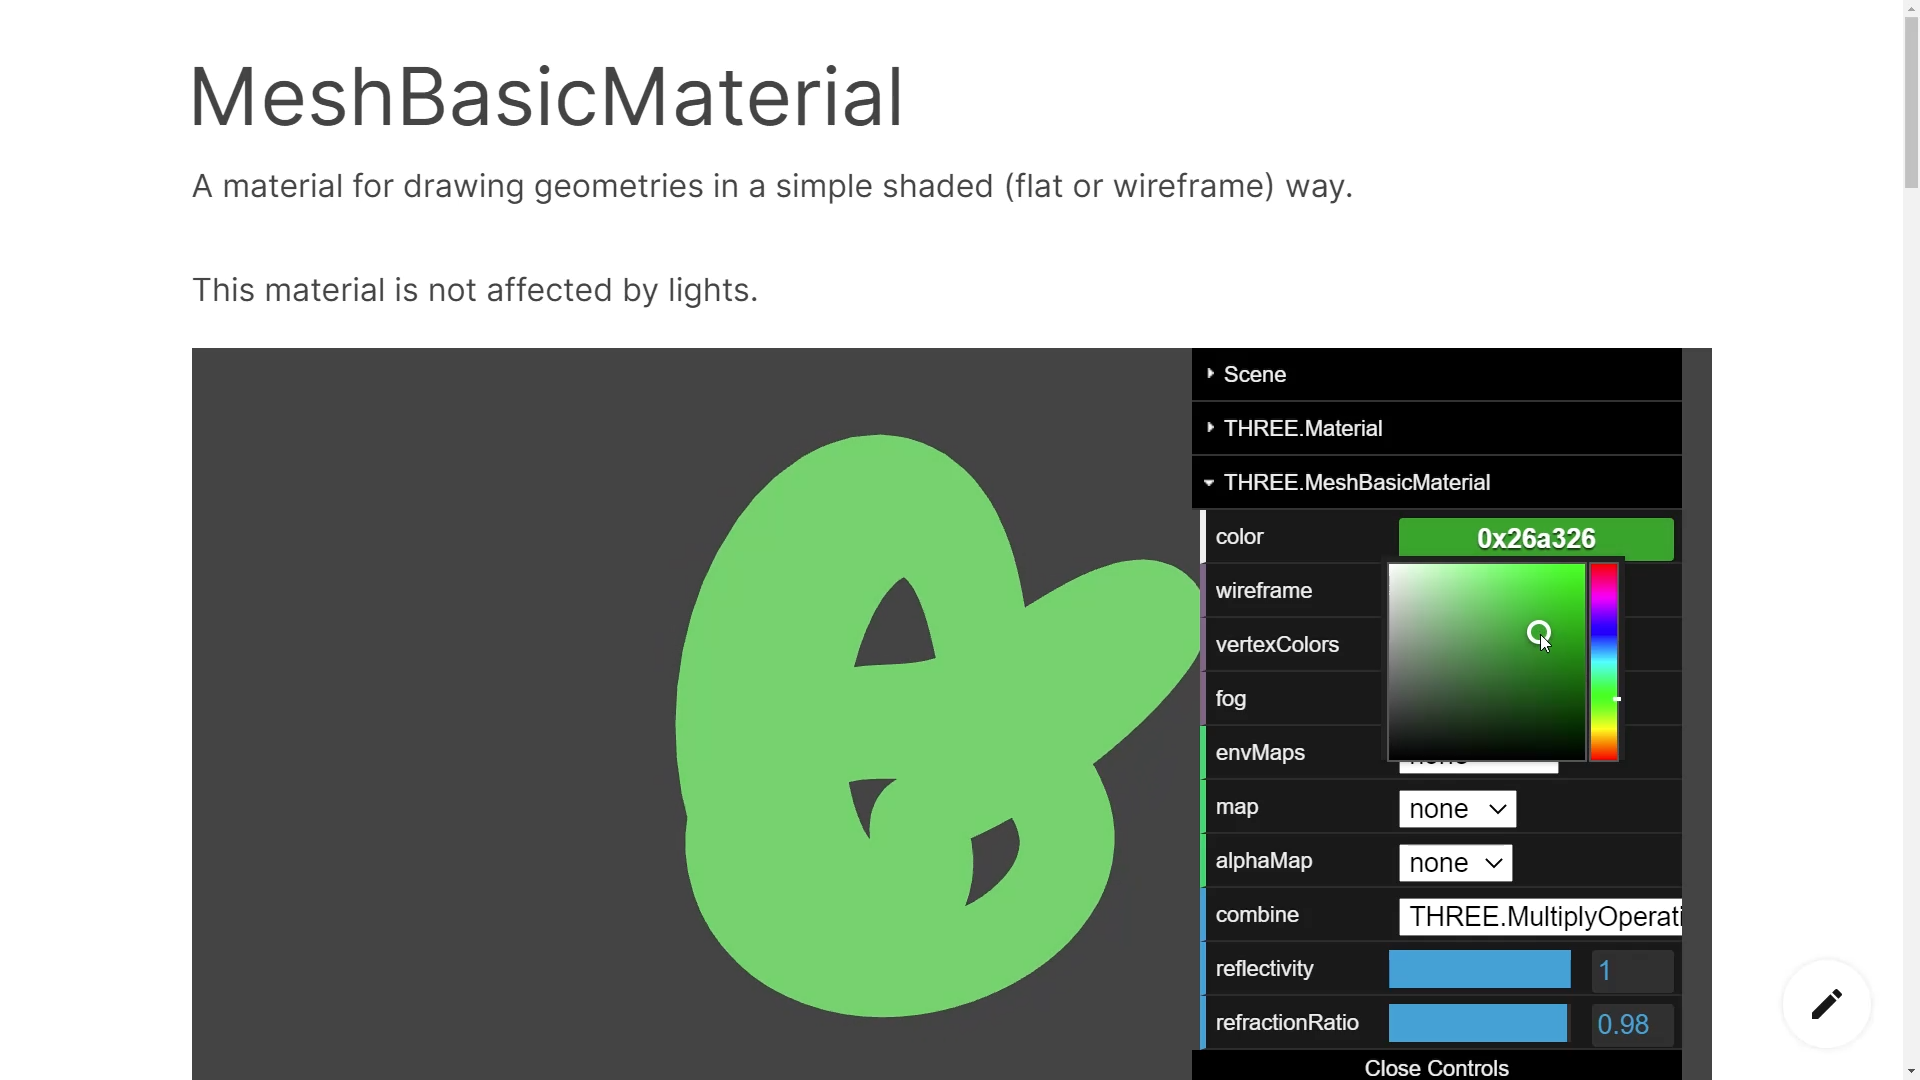 The 3D model doesn’t have a material or texture, so I used Three.js’s basic material, which just renders it as a solid color of my choice that isn’t effected by any lights.
The Camera
After that, I added some camera controls. When I first envisioned this, I thought of the camera following a 3D path that the camera will take. However, I felt that having the camera move forward was enough for the sake of time. I added an invisible HTML element that extended past the screen to make it, so you can scroll down on the page, and made it so that scrolling down moves the camera.
Doing this also makes the window where it draws all the 3D models also move up when you scroll down,
so I used some CSS to make it stay at the same spot on screen.
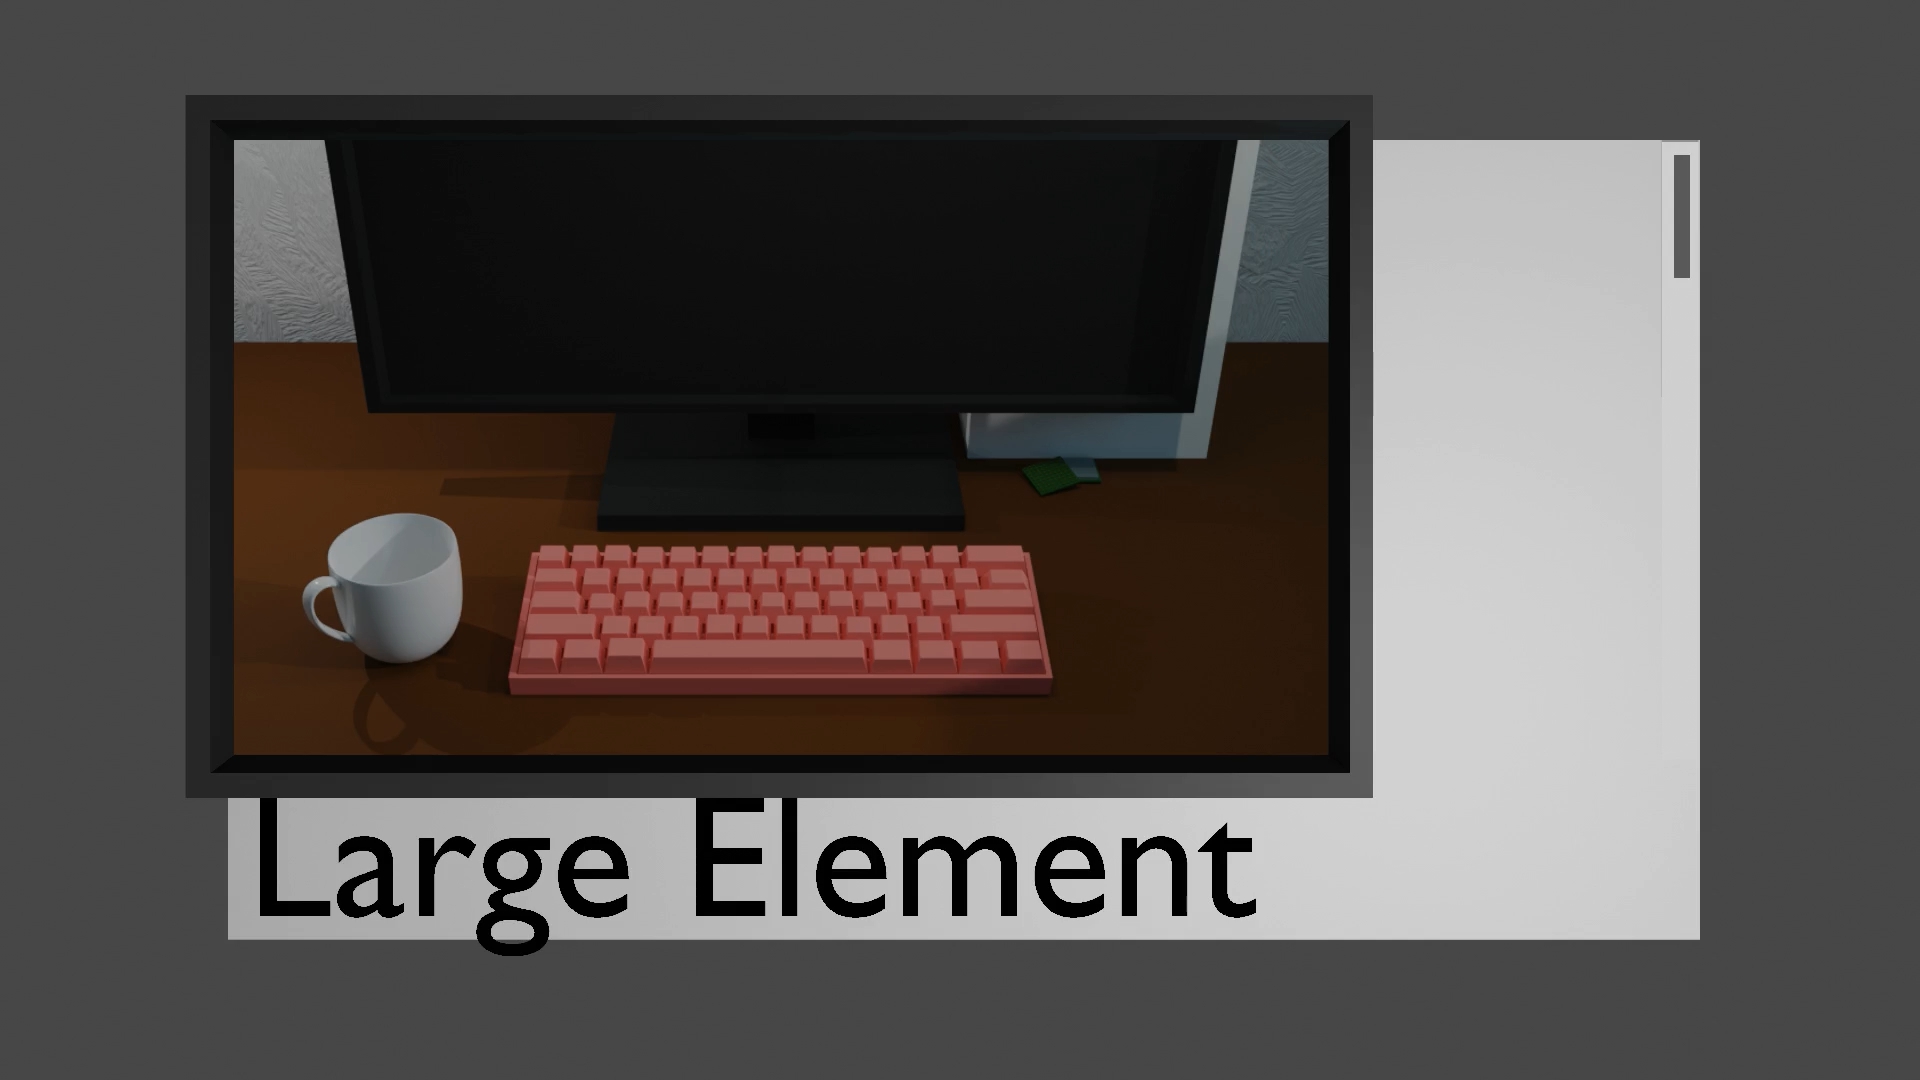
Not a flat 3D Model
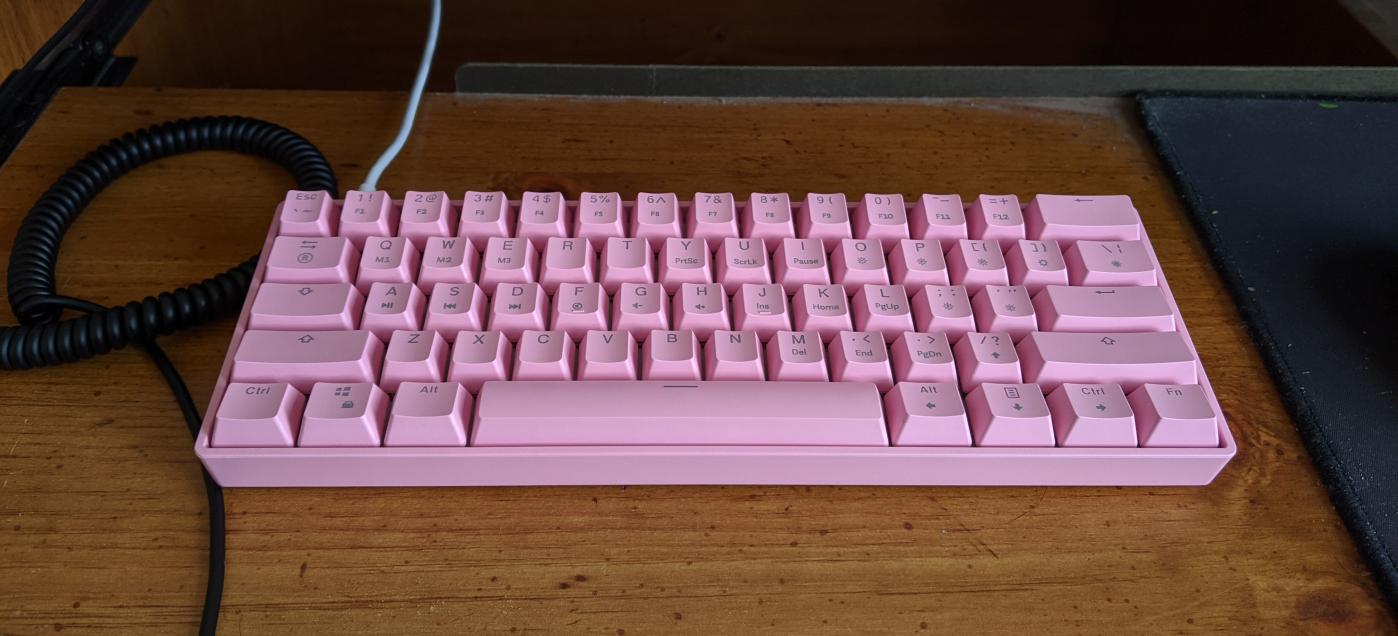
At the time, I was buying a new keyboard, so I decided to 3D model one for the website. I haven’t touched blender in a while, and they changed the interface since I last 3D modeled something in it. However, I just messed around with it and made some donuts before modeling the keyboard. I also went online to find some keyboard, and none of them were to my liking, but I actually got to explore some 3D art on Sketchfab, and got a ton of inspiration.
 I saw someone modeled some old computer and the keyboard was just a bunch of boxes.
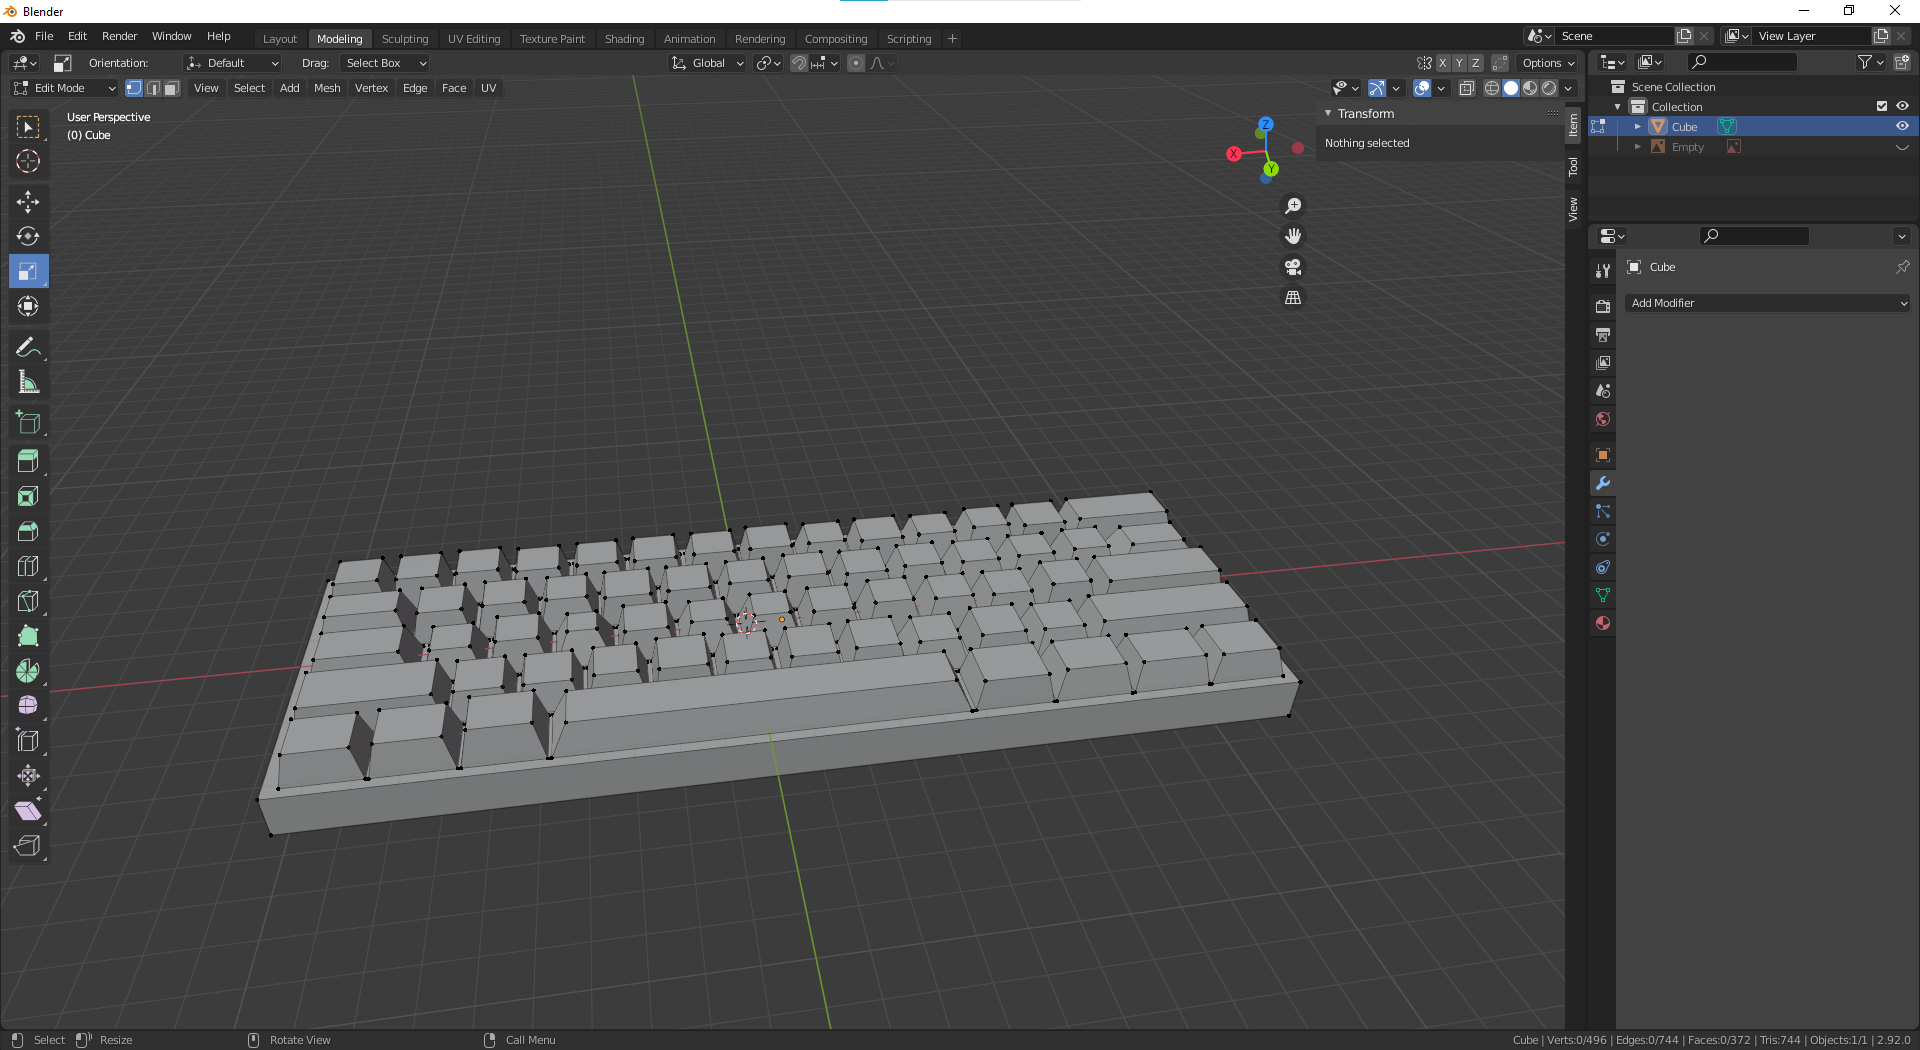
So that’s what I did, I just made different sized boxes and made some sides smaller.
I also made a cup based off of low res cups I saw on Sketchfab. I didn’t stop there, I also made a computer, and a monitor.
HTML in 3D
I could have rendered text in WebGL, but doing so would remove a lot of browser features like text to speech, text select, and links. I would have to implement that stuff myself, there are libraries to do that, but I felt that it would be quicker to get this site working using HTML text. Furthermore, I used Drei, which is like a library full of different stuff for React Three Fiber, I used its HTML overlay for where the text content will be. Drei’s HTML overlay also changes the size of the elements to make it look like they were part of the 3D content.
But when I first used it, it wouldn’t update the size of the elements for some reason unless I tell it to use CSS 3D translate, which created this really blurry text.

I didn’t like that, and I couldn’t figure out what went wrong, but I ended reading the code and recreating it into something that works for me. This solved the blurry text issue by having it not use CSS 3D translate and instead use CSS scale.
The Round One
At this point, I deployed it and showed it off to some people online. I got a bunch of complaints about the cup being cursed. I think it’s because the cup and the name had two different styles that didn’t really match up together,
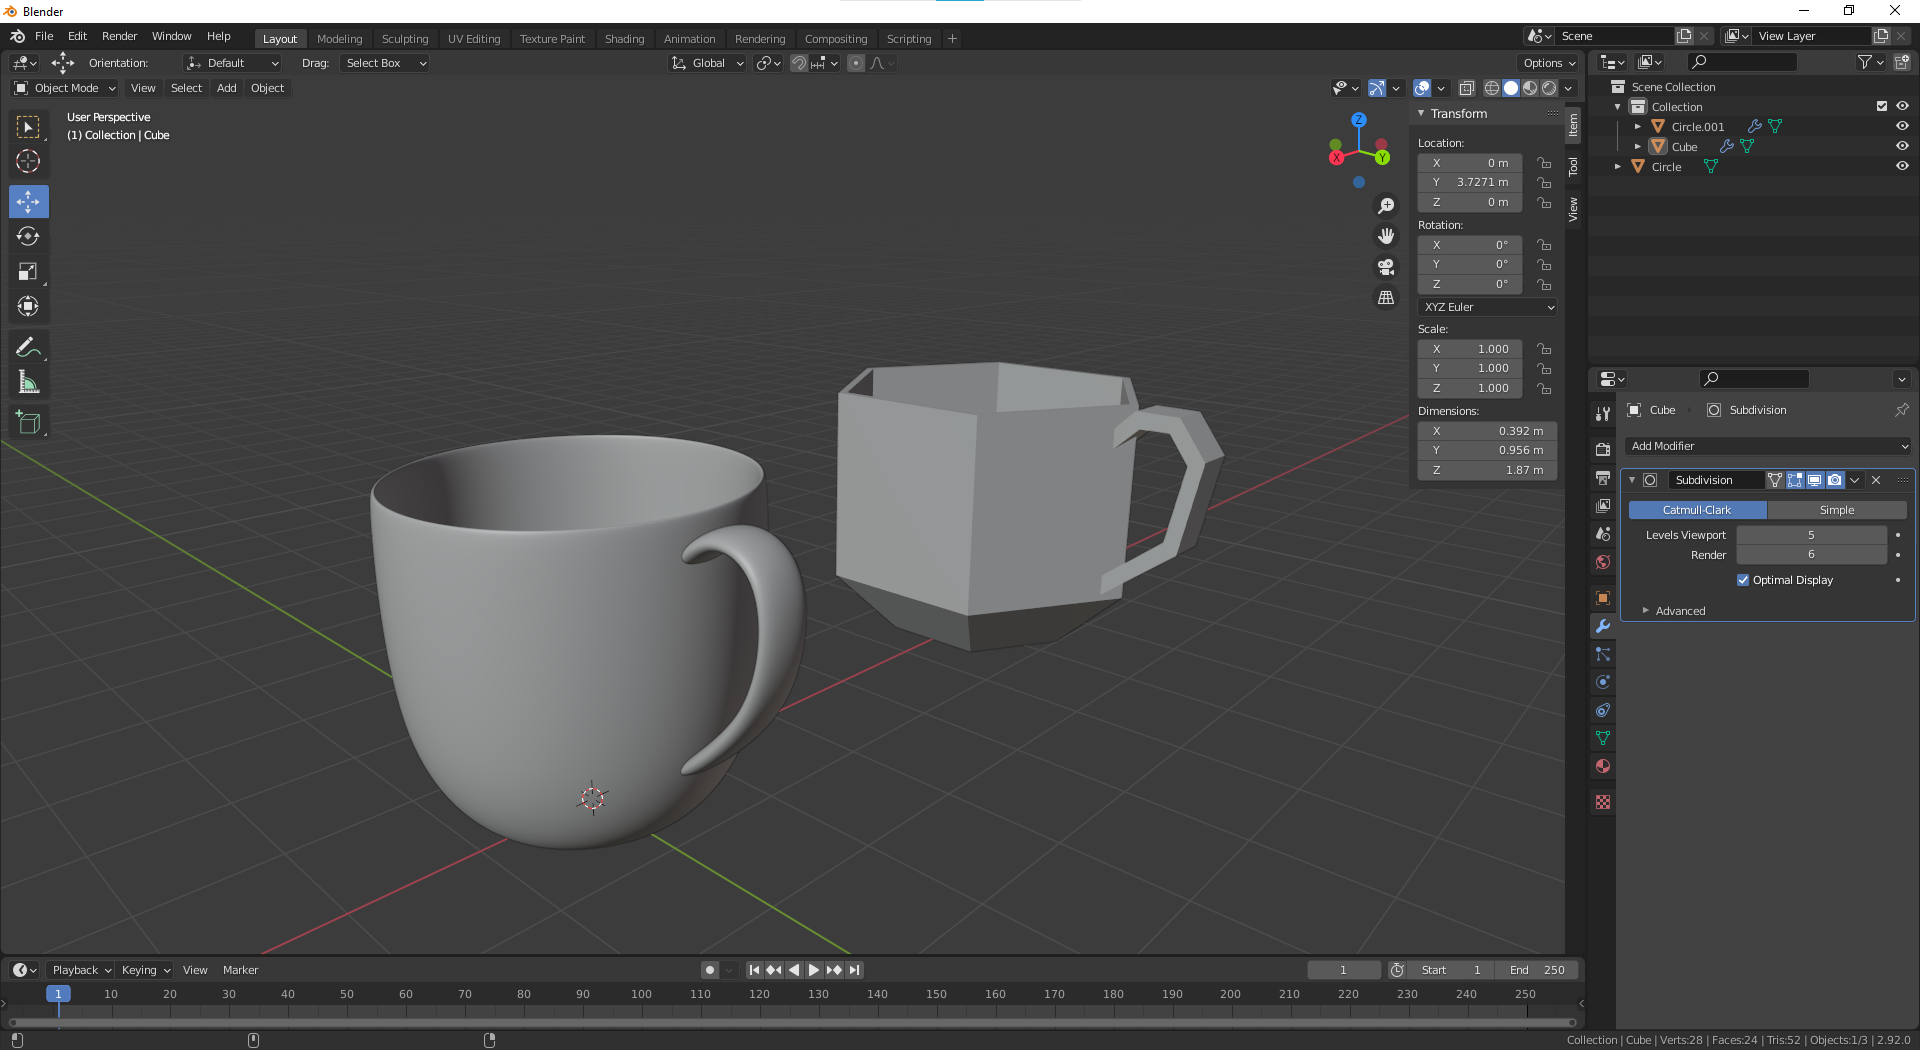
so I decided to make a cup that was round.
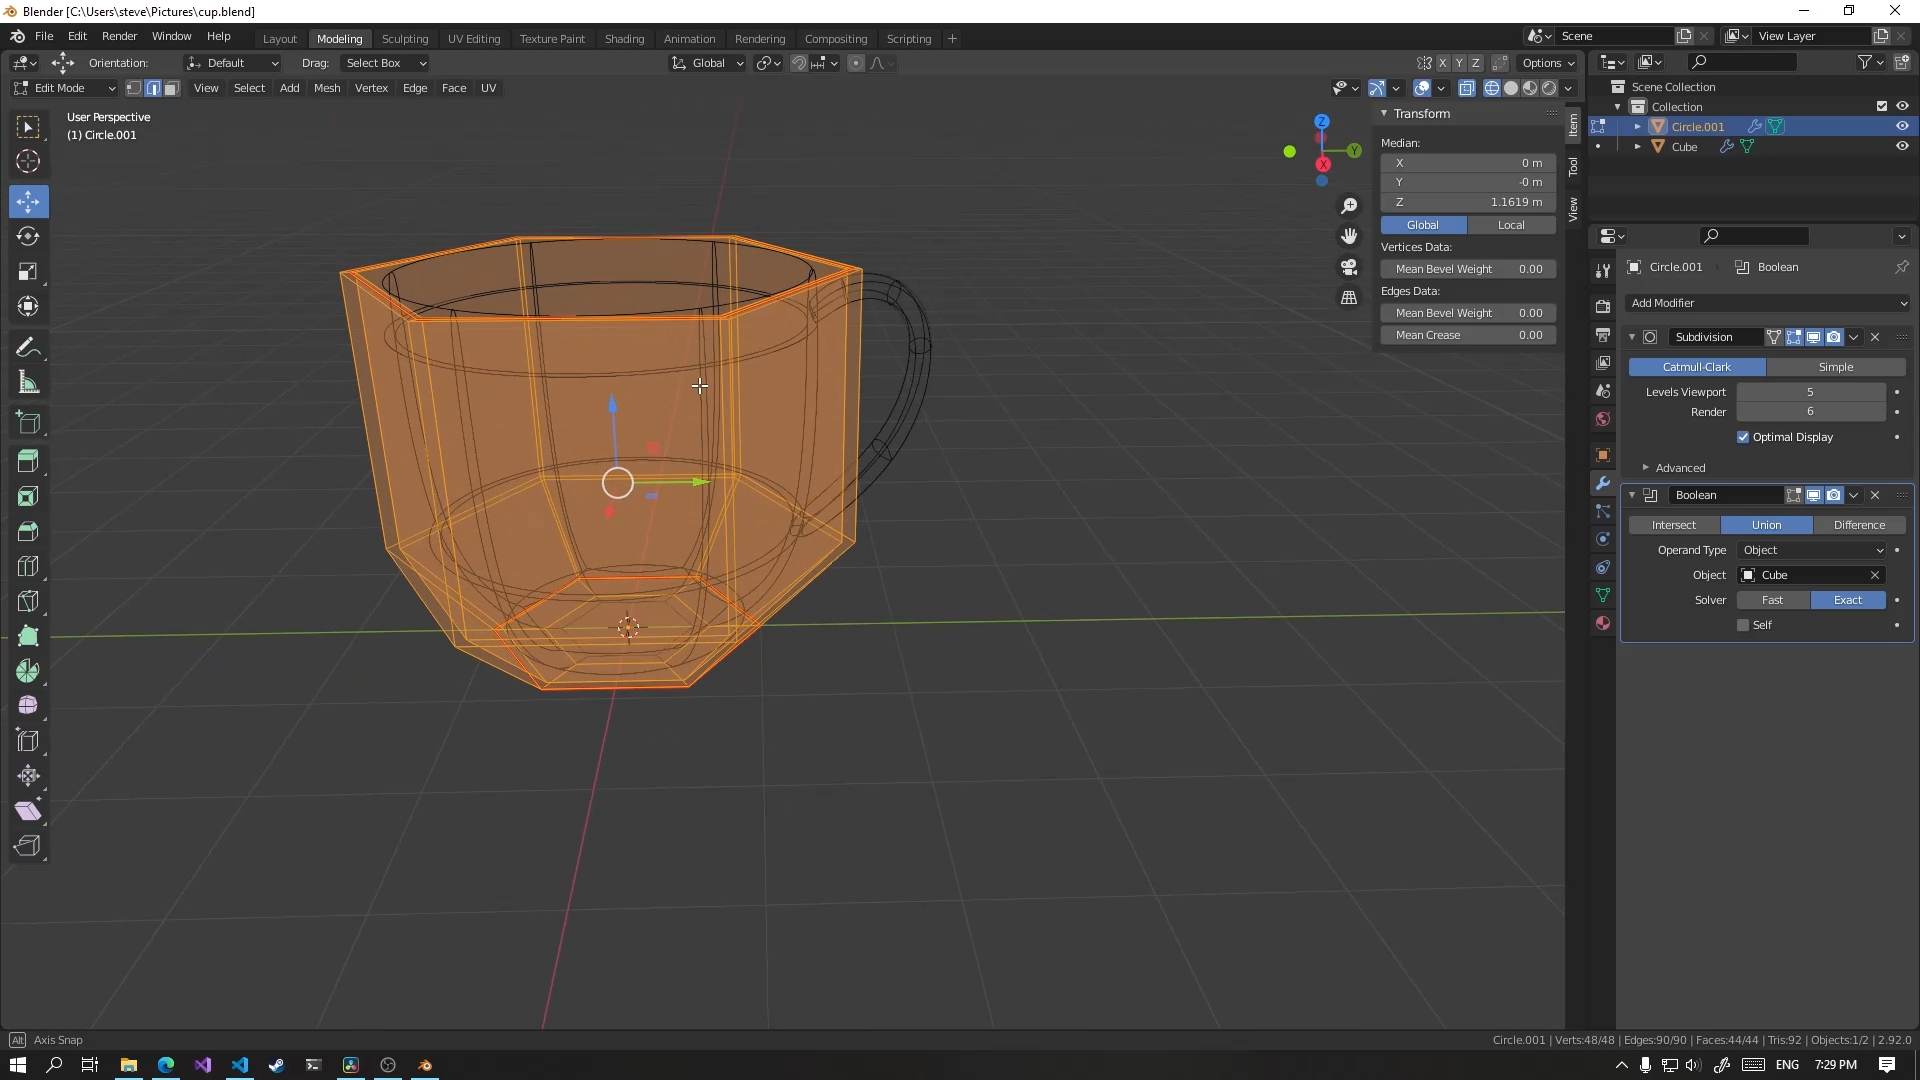
I did some subdivisions on the model and added a few more faces on the top and bottom, and it created this nice round model. However, this model had 2 million triangles. This model is going to be rendered on a slow phone, so I need to lower that triangle count so that it doesn’t cause my site to run so slowly.
But lowering the number would make the cup less smooth looking. I know a trick that will work, and it is known as normal maps. It gives the illusion of a smoother model without more triangles. You can find more info online, but I never did this ever before, so I found tutorials online. Messed it up a bunch of times for hours and hours until I got a good result.
And there we have it, a name smooth cup without breaking the triangle budget.
Different Surfaces One Material

I wanted to add another 3D model to the site, so I made a 3D model of a CPU. The material on the CPU was the most complex part, as a CPU is made up of more than one material. Some parts of it are made of nickel, copper, gold, etc.
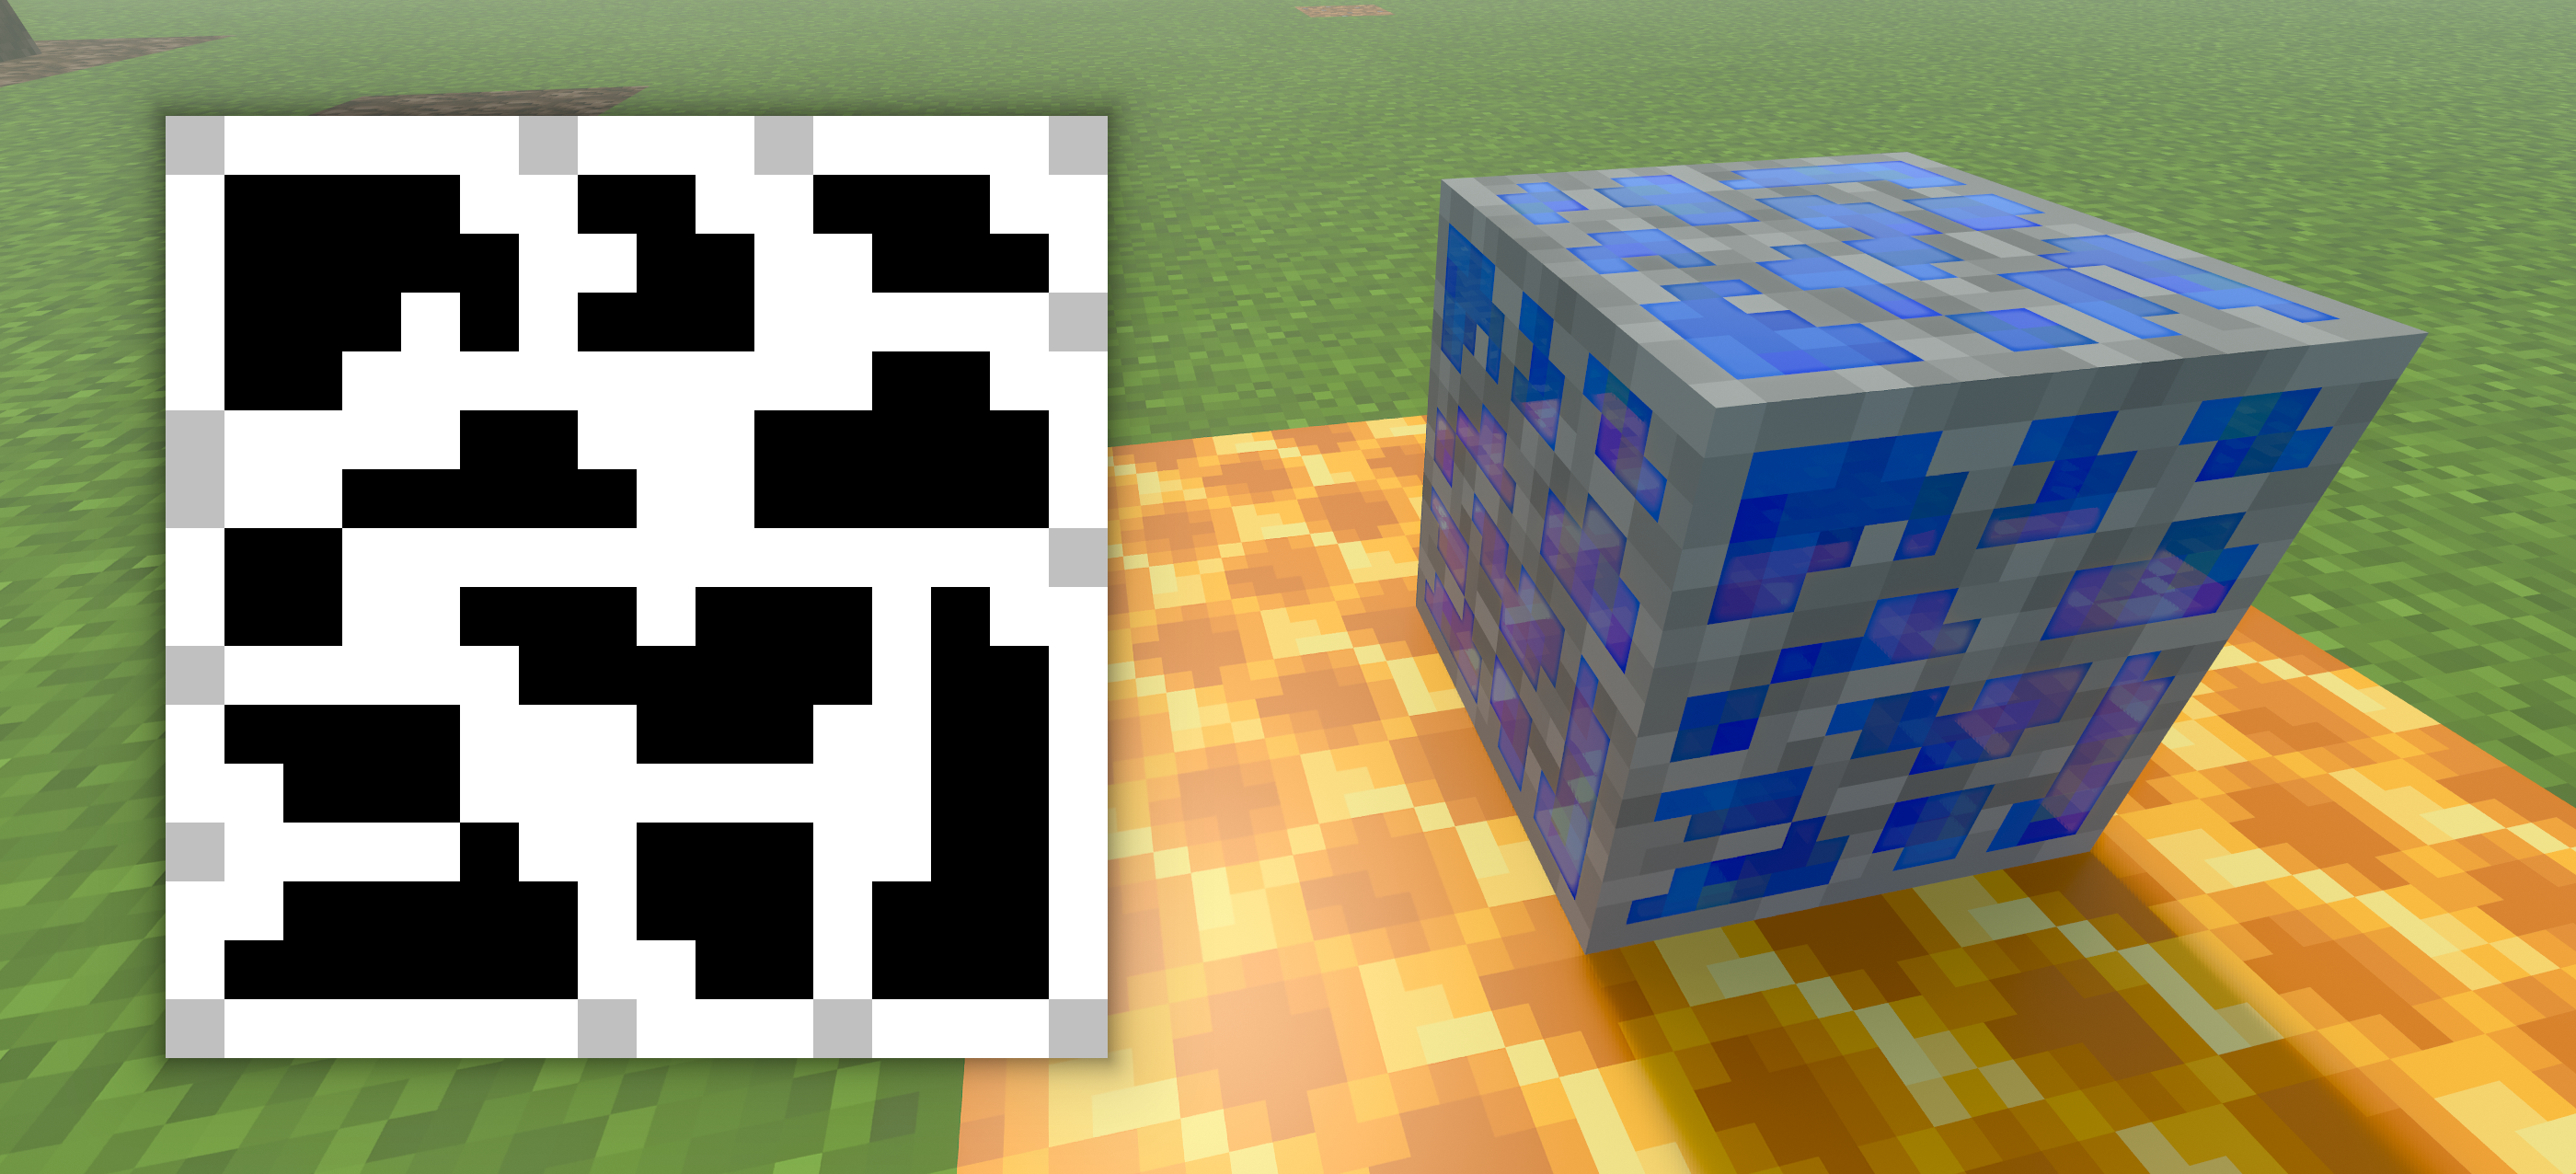 I also never had to do this before, but I actually found a good guide on this for Minecraft textures. Minecraft’s new path tracing renderer for their bedrock version of the game adds in an albedo, metalness, roughness, emissive, height, and normal map to their game, and they gave the community a good guide on how to use these for making texture packs. I’ve actually already known about this, but I have never made those things before, so I used this as a nice guide.
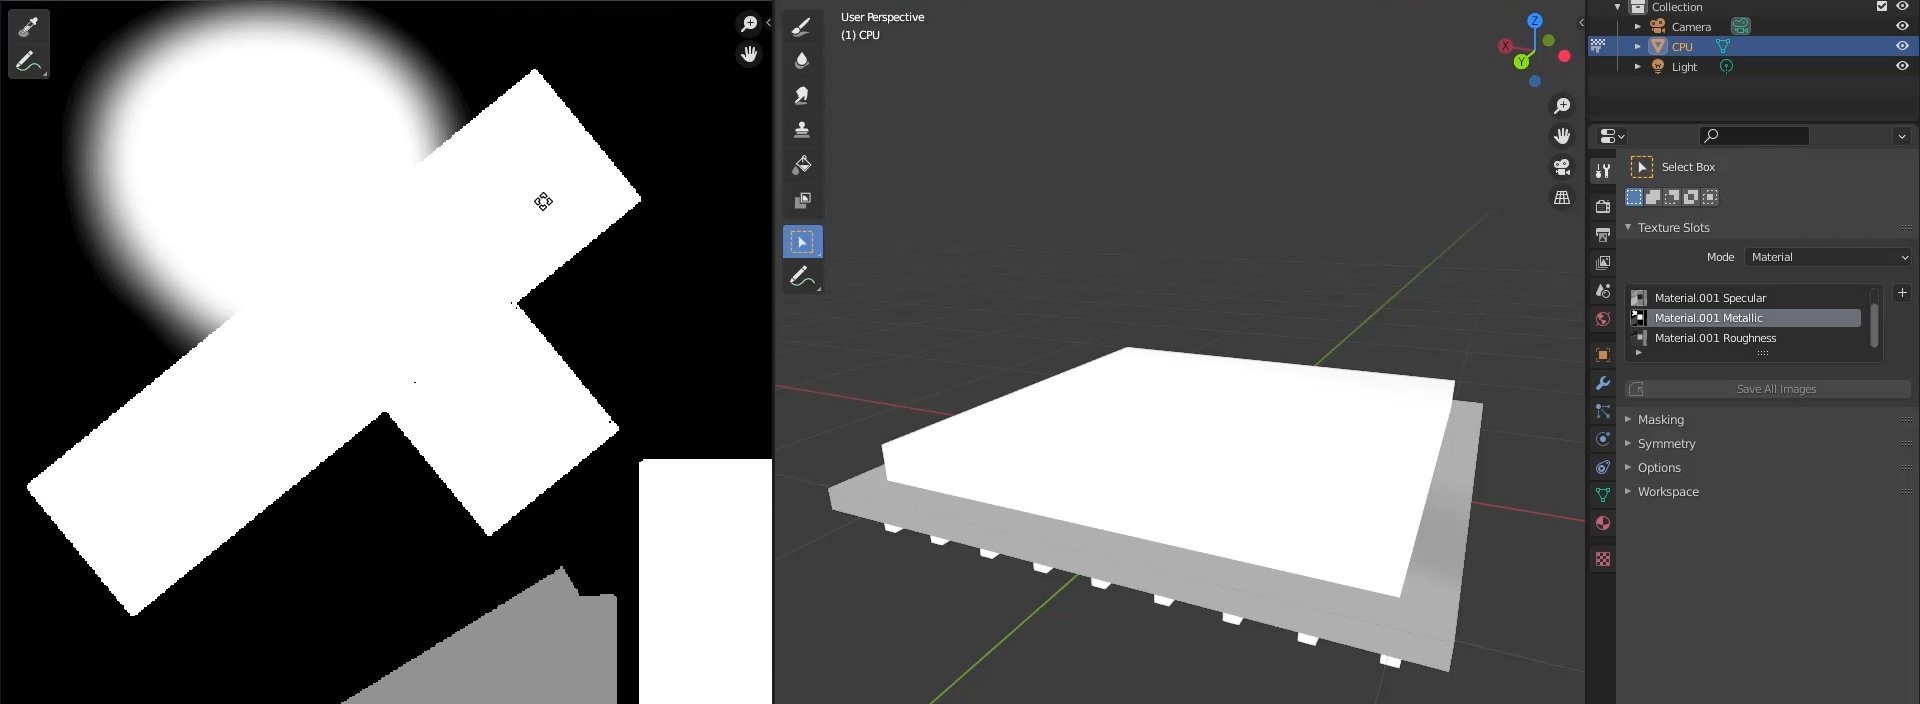
I quickly got familiar with blender’s texture painter and UV editor so that I can paint new albedo, metal, rough, and specular maps.
99 Small Issues
From here, I fixed mostly small issues. I wasn’t a fan of the scroll bar because I felt that it was destroying the illusion of a 3D website. At first, I didn’t know how to do this and messed around with the HTML and CSS to get it to not show a scroll bar. It took me another day when I figured out a solution, once I did, I had to rewrite a good chunk of the HTML layout.
I ended up making a large HTML element that you can scroll with the 3D content and, using CSS, made the scroll bar off-screen to the right and made it so that you can’t scroll to it. I then had to make the 3D content stick to the top and left sides of the screen using CSS sticky.
However, CSS sticky elements take up space as such, it allows the user to scroll more than before.
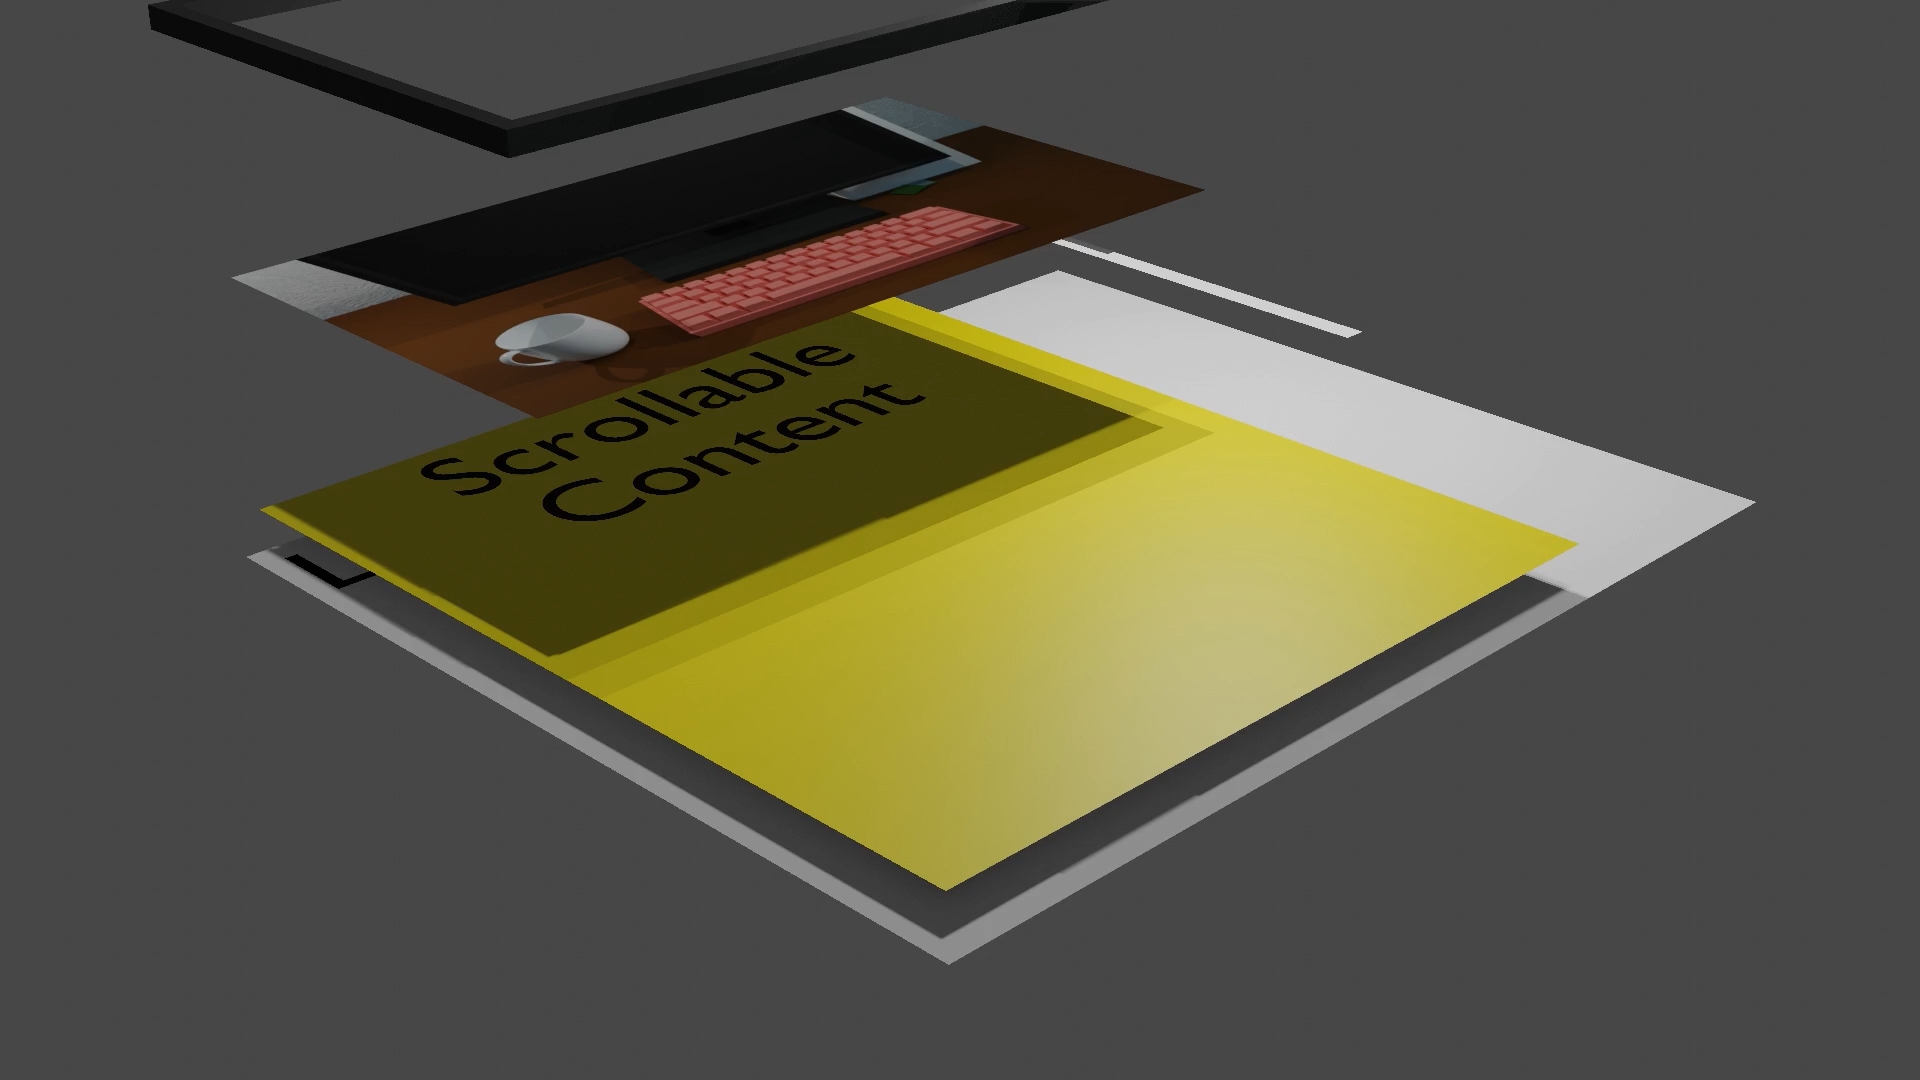
The solution I wanted was having the scroll element under the canvas and button.
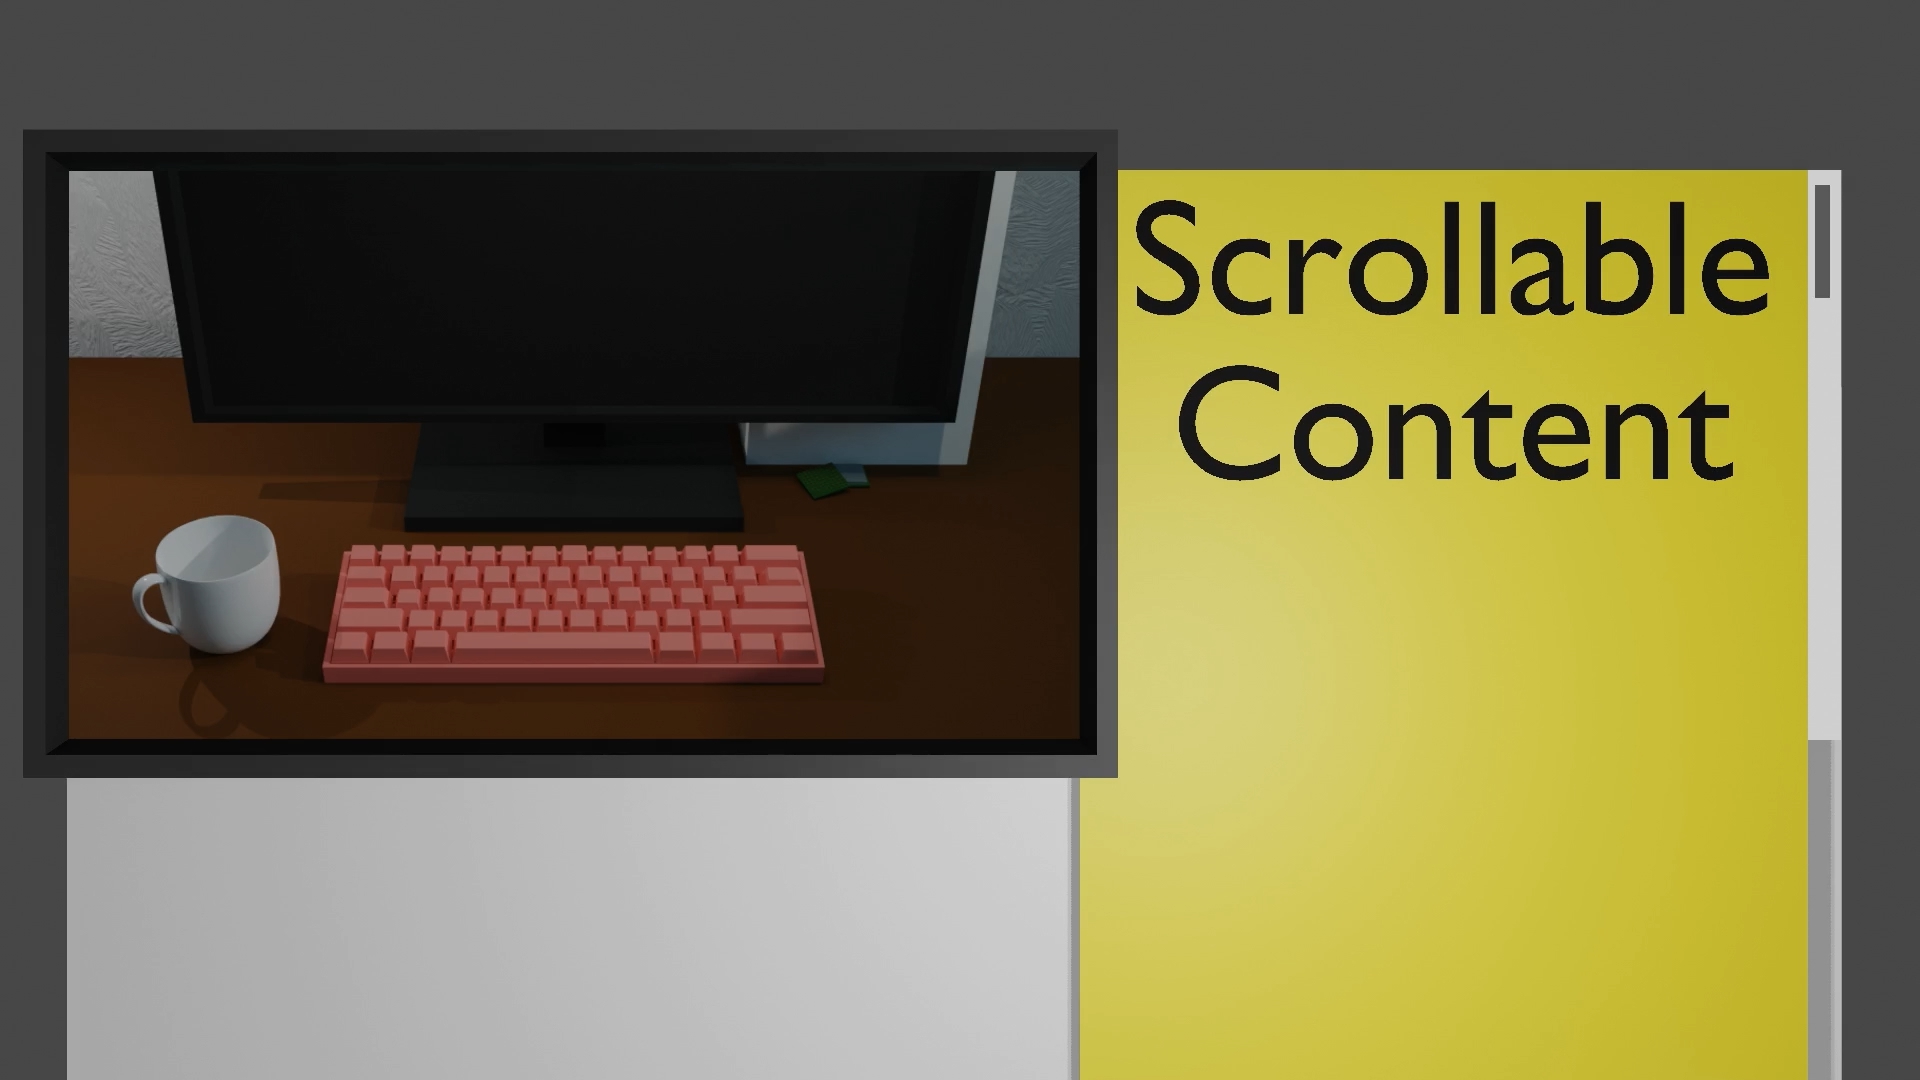
However, a simpler solution was to use CSS flex to move the scroll element to the right of the canvas, where it should also be off-screen.
Another problem was that is for some reason, I don’t know why, touching buttons outside this big scrollable element, like the Home button, would cancel some inputs like scrolling. Making scrolling feel unresponsive.
I make this stick to the 3D content, but it would position itself a bit off-screen for some reason. In fact, this made me notice that the 3D content was also a bit off centered now too. I tried fixing this with just CSS, but after a day and no progress, I realized that the whole site requires JavaScript anyway, so might as well do this positioning in JavaScript.
const viewportTop = topRef.current.getBoundingClientRect().top;
const viewportBottom = bottomRef.current.getBoundingClientRect().bottom;
const viewportCenterY = (viewportTop + viewportBottom) / 2;
const canvasRect = canvasContainer.current.getBoundingClientRect();
const canvasCenterY = (canvasRect.top + canvasRect.bottom) / 2;
if (canvas.current.parentElement) {
    const transformGoalY =  viewportCenterY - canvasCenterY;
    if (transformGoalY !== canvasTransformY)
        canvas.current.parentElement.style.top = `${transformGoalY}px`;
    canvasTransformY = transformGoalY;
}

if (backButtonRef.current.parentElement) {
    const backBottom = canvasRect.bottom - viewportBottom;
    if (backButtonBottom !== backBottom)
        backButtonRef.current.parentElement.style.bottom = `${backBottom}px`;
    backButtonBottom = backBottom;
}
I calculated where the elements should be on-screen and positioned the elements on every frame. And that fixed the strange issues and hides the scroll bar.
I also noticed an issue where the Non-JavaScript content would flash on-screen before the 3D content would then flash on screen. I decided to make the Non-JavaScript content only visible when there’s no JavaScript content.
If JavaScript is enabled, some text would fade in and when the first 3D model finished loading, it would fade out the text and fade in the 3D content.
The Results
I showed it to people online and people were impressed. React.js, Three.js, and Blender, are all pretty good tools that can be used together to make some fun 3D websites. Check it out at yourWaifu.dev.
Thanks for Reading
Writing, editing, and website by Hao Qi Wu 🔗Link
"Just a girl" (🔗Link) by 腱鞘炎の人 is licensed under Creative Commons Attribution (🔗Link).
Damaged Helmet - 🔗Link Battle Damaged Sci-fi Helmet - PBR by theblueturtle_, published under a Creative Commons Attribution-NonCommercial license
1984 Apple Macintosh 128k (Expanded) 🔗Link